We can’t always make it to a teacher to get our instruments in tune. Sometimes our instruments go out of tune on a vacation, and sometimes we are stuck at home with the schools closed because of a virus outbreak. Either way, learning how to tune a string instrument is an important skill that can seem very daunting at first. If you follow these tips and tricks, you’ll have your instrument in tune in no time without breaking any strings!
What You Need to Tune Your Instrument
- A tuner (either a physical electronic tuner or an app on your mobile device)
- A music stand
- Your instrument
You also need to know the note names for your instrument’s strings. Going from high to low (in pitch) the strings are:
- Violin – E A D G
- Viola – A D G C
- Cello – A D G C
- Bass – G D A E
Write those down on a sheet of paper, you will use them as reference later!
How to Tune Your Instrument
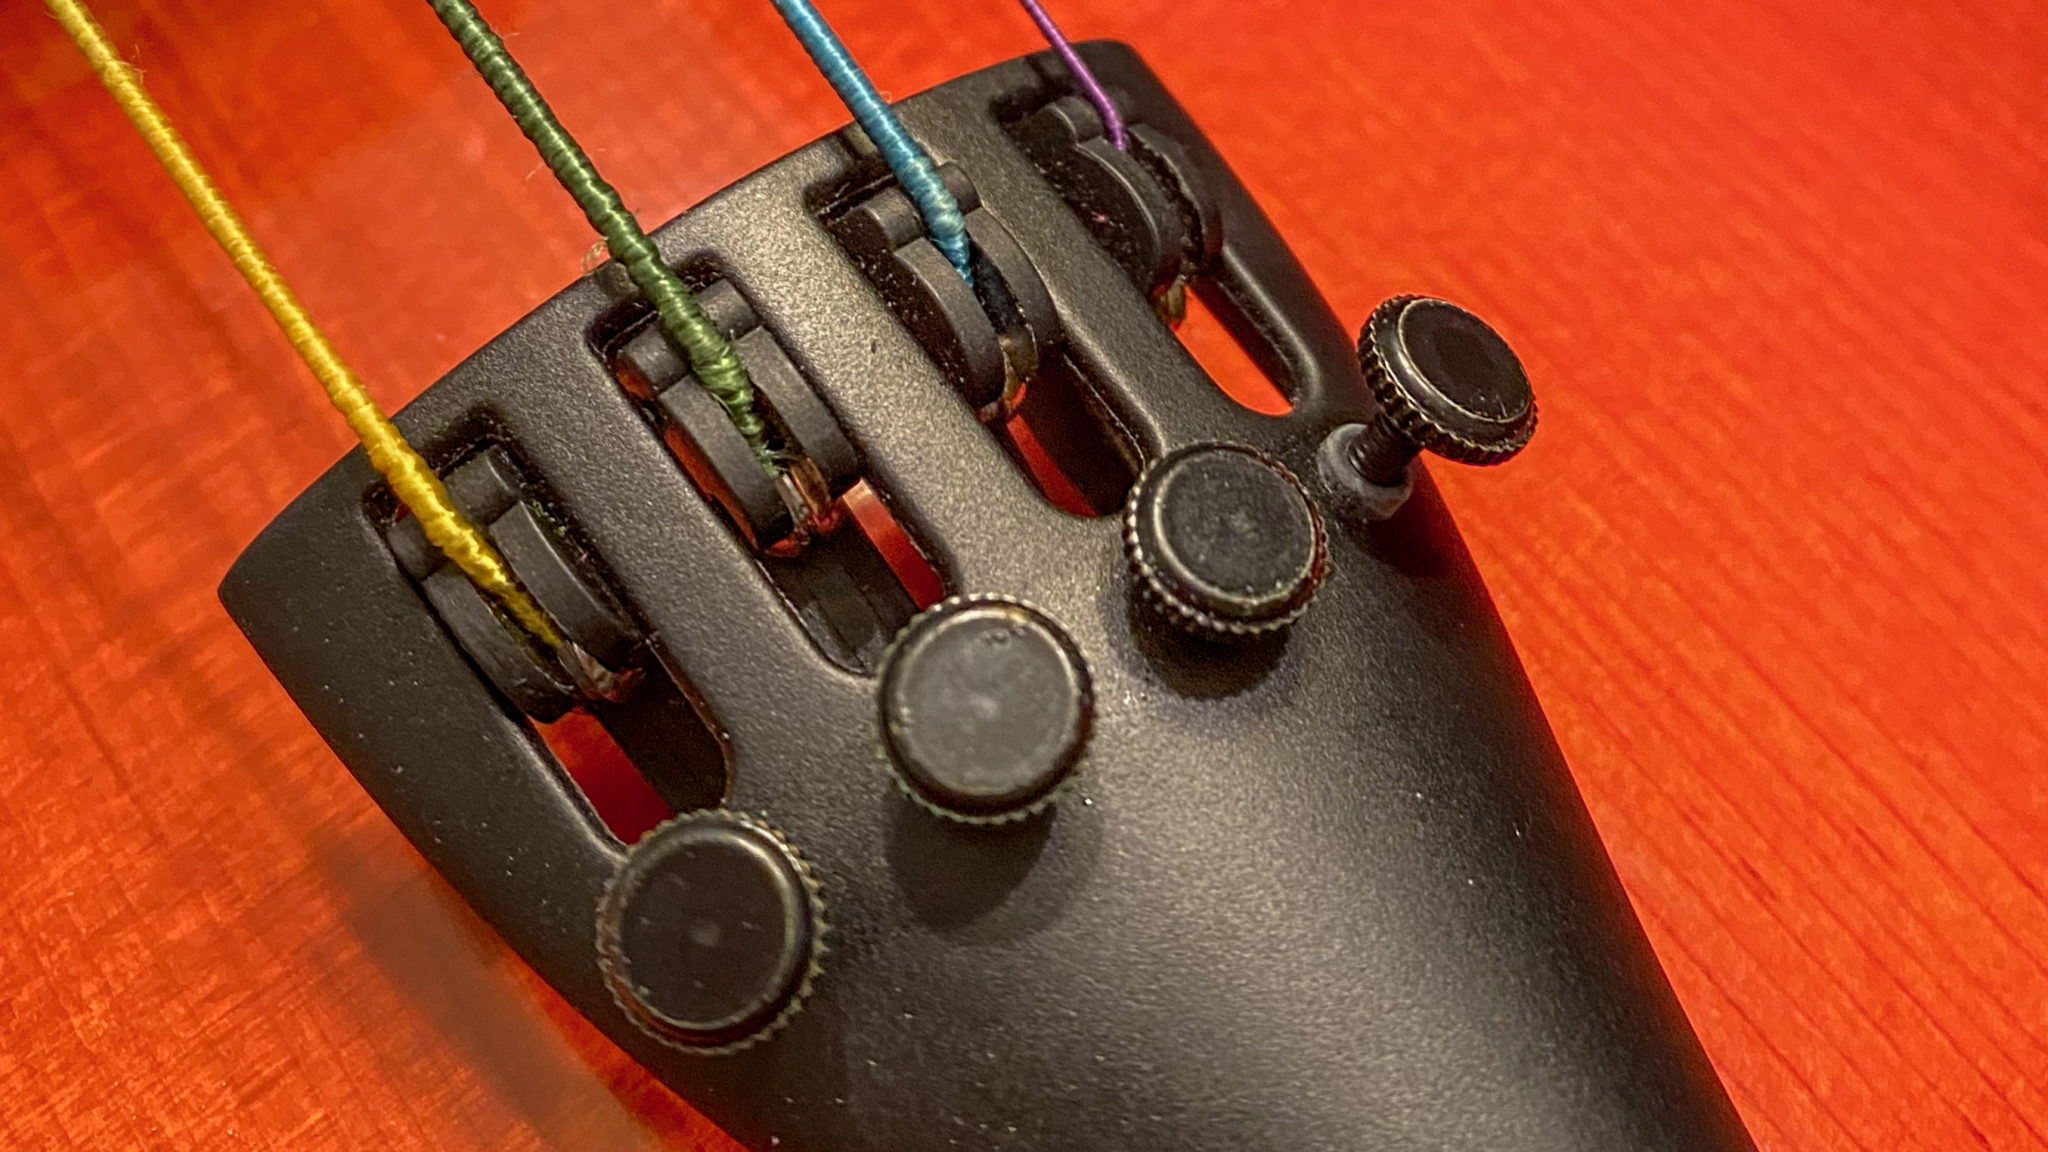
Most string instruments have two ways to tune: the fine tuners at the bottom of the instrument, and the pegs up at the top. Whenever possible try to use the fine tuners. They are for making small adjustments and you are less likely to break a string using them. Your strings will usually be close enough to being in tune to get away using the fine tuners. However, if you absolutely must, we will include some instruction on how to use the pegs later.
Using the Fine Tuners
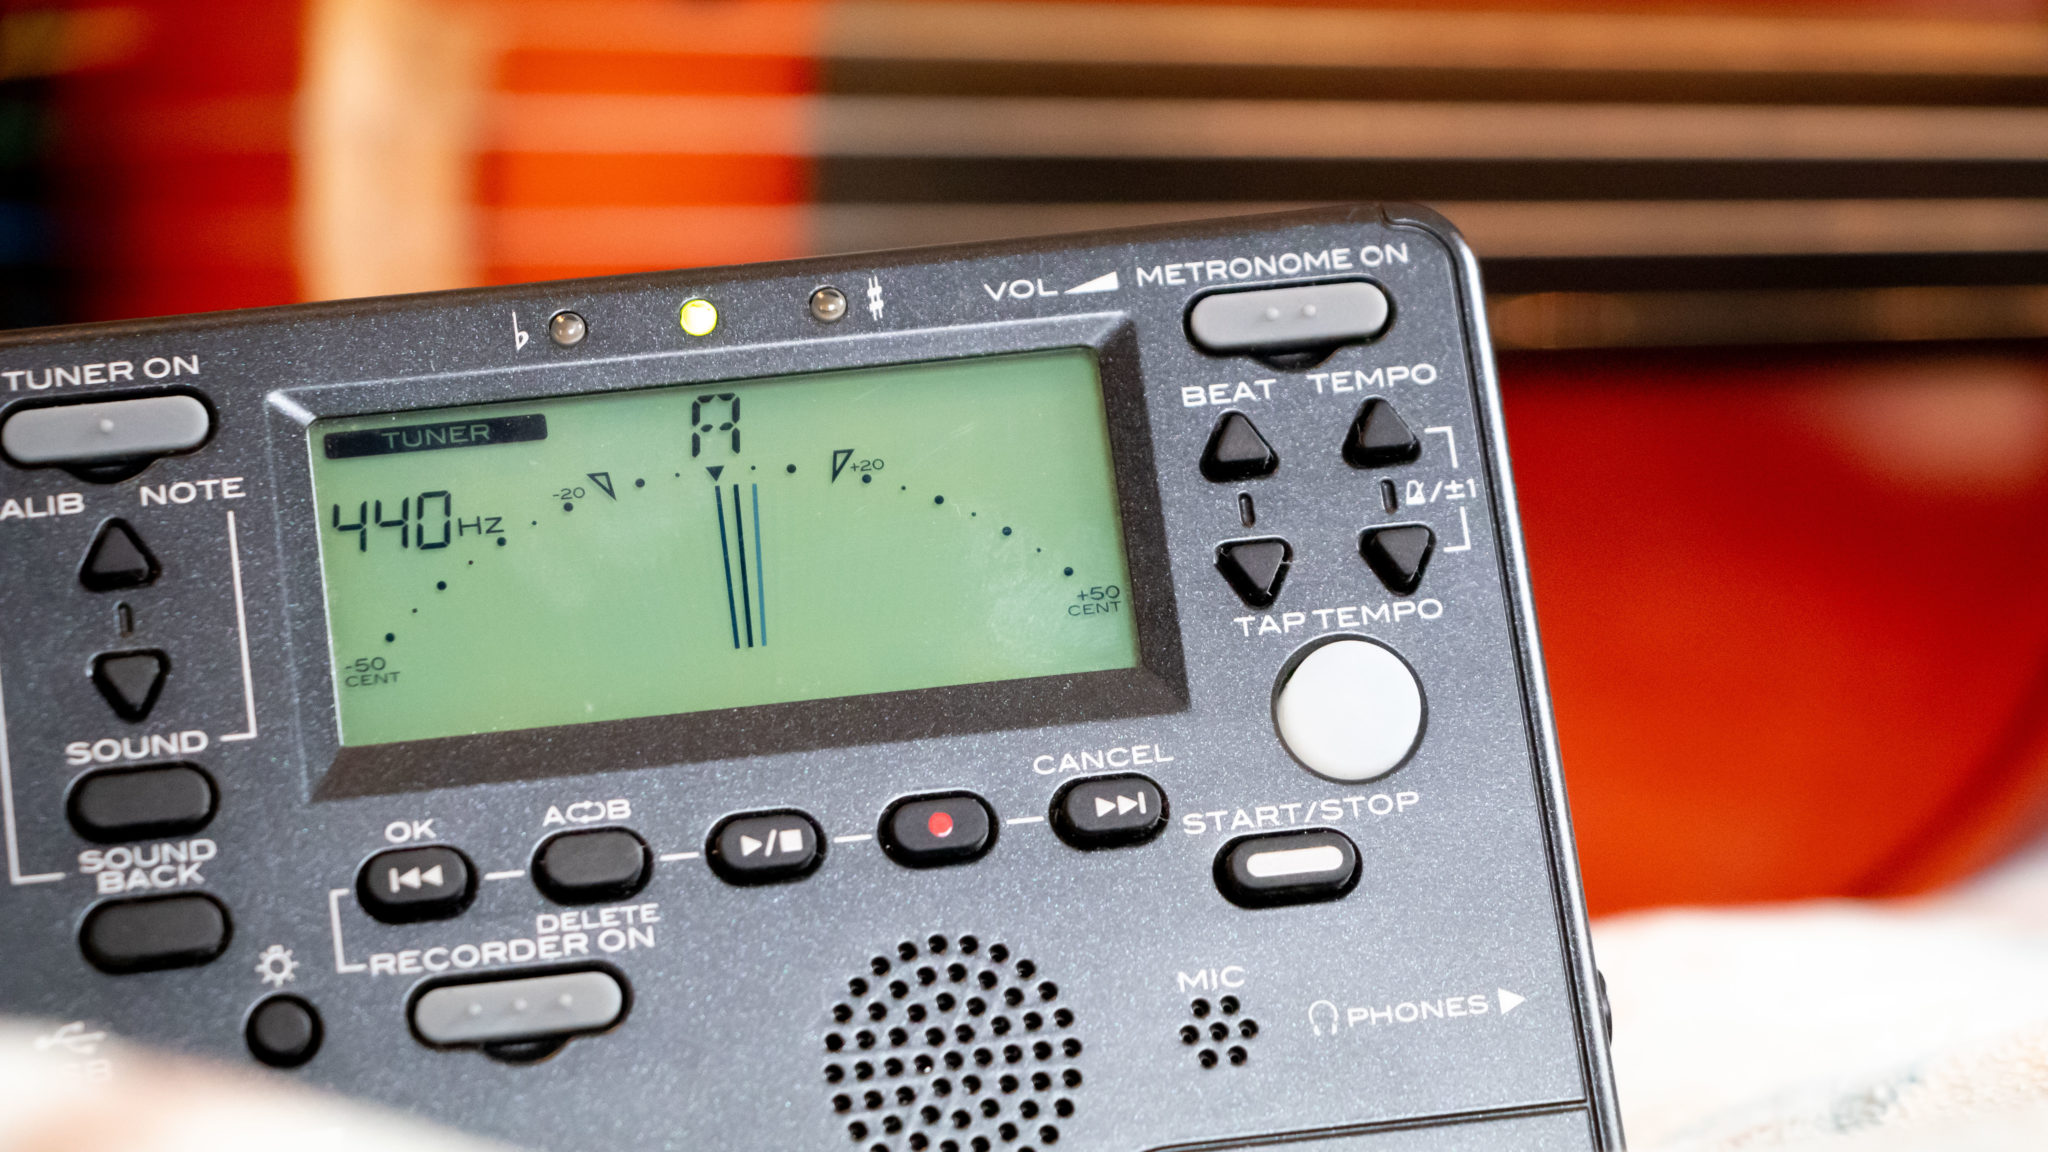
Set your tuner on a stand in front of you so you can see it while you hold your instrument. Then pluck the highest (thinnest) string. Your tuner should light up and say what pitch you are playing. It will also show whether the note was sharp (too high) or flat (too low). Most tuners have a dial where center is perfectly in tune, left of center is flat, and right of center is sharp.
Now you will use your fine tuner to raise or lower the pitch as needed. Turn it clockwise to raise the pitch and counterclockwise to lower it. Your goal is to get the tuner to display the correct name of the string (use the string names you wrote down earlier) with the dial more or less centered. Repeat this for each string. (Note: the musical alphabet only goes to G, so it is A B C D E F G A.) It is very important to keep plucking the string while you tune. Your ears (or your students) will know when the string is getting too high in pitch. Once you have everything more or less in tune, have your student check it again using the bow.
Using the Tuning Pegs (When Necessary)
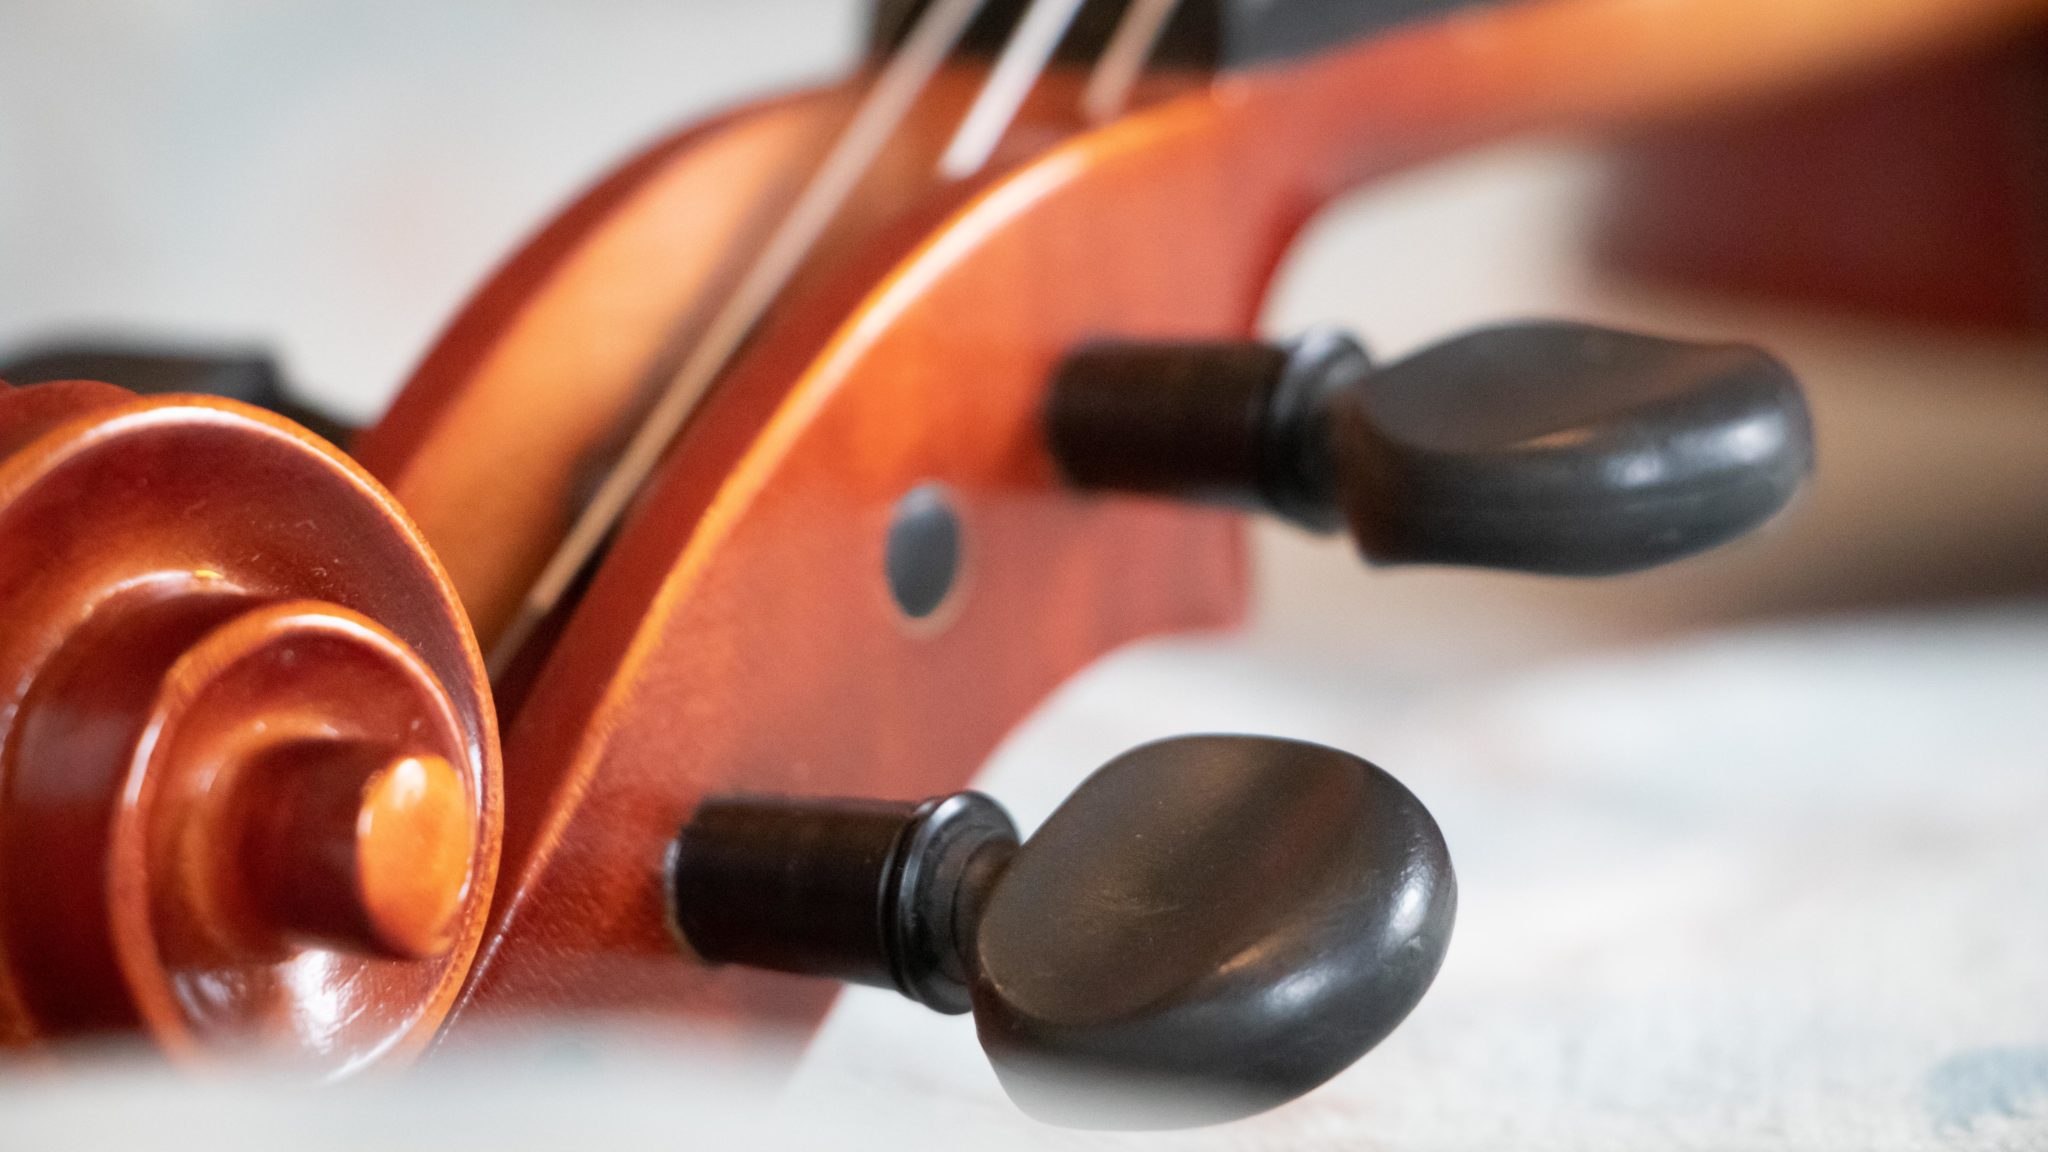
Should you absolutely need to use your pegs here are some tips to make it as stress free as possible.
- Turning a peg towards the body of your instrument lowers the pitch. Turning a peg away from the body of your instrument raises it.
- Pegs are tapered, so in order to keep the peg from spinning out you have to push in while you turn.
- Go slowly and make small adjustments. Pegs are incredibly sensitive and a little goes a long way. Turn it too much and you are guaranteed to break a string.
- Always pluck the string before you turn the peg. This will allow you to hear how much you are changing the pitch. Turning a peg without plucking the string first is like parking with your eyes closed. Something bad is bound to happen!
Here Are a Few Videos to Help You Get Started
How to Tune Your Violin or Viola:
How to use an Electronic Tuner:
Hopefully that sets you up with everything you need to get and keep your instrument in tune!